
Are you ready to transform your kitchen with custom cabinets made by your own hands? Creating kitchen cabinets might sound like a big task, but with the right guidance, you can design and build cabinets that perfectly fit your space and style.
Imagine having full control over the size, materials, and look—no more settling for off-the-shelf options. You’ll discover simple steps and practical tips to create beautiful, sturdy kitchen cabinets that save you money and add real value to your home. Keep reading to unlock the secrets of cabinet making and turn your kitchen dreams into reality!
Planning Your Cabinets
Measure your kitchen space carefully before starting. Use a tape measure to get exact width, height, and depth. Note the locations of doors, windows, and appliances. This helps avoid mistakes and wasted materials.
Choose cabinet styles that fit your kitchen’s look. Popular styles include shaker, flat-panel, and raised-panel. Each style changes the kitchen’s feel from modern to classic. Pick what suits your taste and the room’s design.
Select materials and hardware based on durability and budget. Common materials are plywood, MDF, and solid wood. For hardware, pick handles and hinges that match your cabinet style. Good hardware improves both function and appearance.
Gathering Tools And Supplies
Essential woodworking tools include a circular saw, drill, and clamps. A measuring tape and square help ensure accuracy. Sandpaper and a screwdriver are also needed. These tools make cutting and assembling easier.
Safety equipment is very important. Use safety glasses to protect your eyes. Wear ear protection if tools are loud. Gloves can protect your hands from splinters and cuts. Always work in a well-ventilated area to avoid breathing dust.
| Materials | Description |
|---|---|
| Wood | Plywood or hardwood for cabinet frames and doors |
| Wood Glue | Helps hold pieces together securely |
| Screws & Nails | For assembling the cabinet parts |
| Paint or Stain | For finishing and protecting the wood |
| Hinges & Handles | For cabinet doors and drawers |
Cutting And Preparing Pieces
Start by cutting the cabinet carcass panels to the correct size. Use a saw with a guide for straight edges. Measure twice, cut once to avoid mistakes.
Next, drill shelf pin holes evenly spaced on the side panels. Use a drill with a shelf pin jig for accuracy. This helps shelves fit securely and adjust easily.
Prepare the faceframes by cutting the frame pieces to size. Join them using wood glue and clamps for a tight fit. Sand the edges smooth before assembly.
Building Cabinet Boxes
Start by joining the side panels to the bottom panel of the cabinet box. Use clamps to hold pieces firmly. Secure them with screws or nails for strength. Make sure edges line up perfectly.
Check the box for squareness by measuring diagonally from corner to corner. Both diagonals should be equal. Adjust clamps or panels until the box is square. Place the box on a flat surface to confirm it is level. Use shims if needed to level it.
Install shelves by marking shelf heights inside the box. Drill holes for shelf pins evenly on both sides. Insert shelf pins and place shelves on top. Ensure shelves fit snugly and are stable. Adjustable shelves allow flexibility for storage.
Creating Doors And Drawers
Shaker style doors are simple and clean. Use a flat center panel with a frame around it. Cut all pieces to size and join the frame with strong glue and nails. Sand the door smooth for a nice finish. This style fits well in many kitchens.
Drawer boxes need to be sturdy and fit well inside the cabinet. Use plywood or solid wood for the sides and bottom. Cut pieces to the right size and join them with screws or nails. Check that the box is square before moving on.
| Step | Details |
|---|---|
| Choose drawer slides | Pick the right length and type for your drawer. |
| Attach slides to cabinet | Use screws to fix slides firmly inside the cabinet. |
| Attach slides to drawer | Fix the other part of the slides to the drawer box. |
| Test drawer fit | Slide the drawer in and out to ensure smooth movement. |
Finishing Your Cabinets
Sanding makes the cabinet surface smooth and ready. Use fine-grit sandpaper to avoid scratches. Remove dust with a clean cloth before painting or staining.
Painting needs thin, even coats. Let each coat dry fully before adding another. Use a brush or roller for best results. For staining, apply with a cloth and wipe off extra to show wood grain.
Protective coatings keep cabinets safe from scratches and water damage. Clear polyurethane or varnish works well. Apply in thin layers and let dry completely. Light sanding between coats helps the finish stick better.
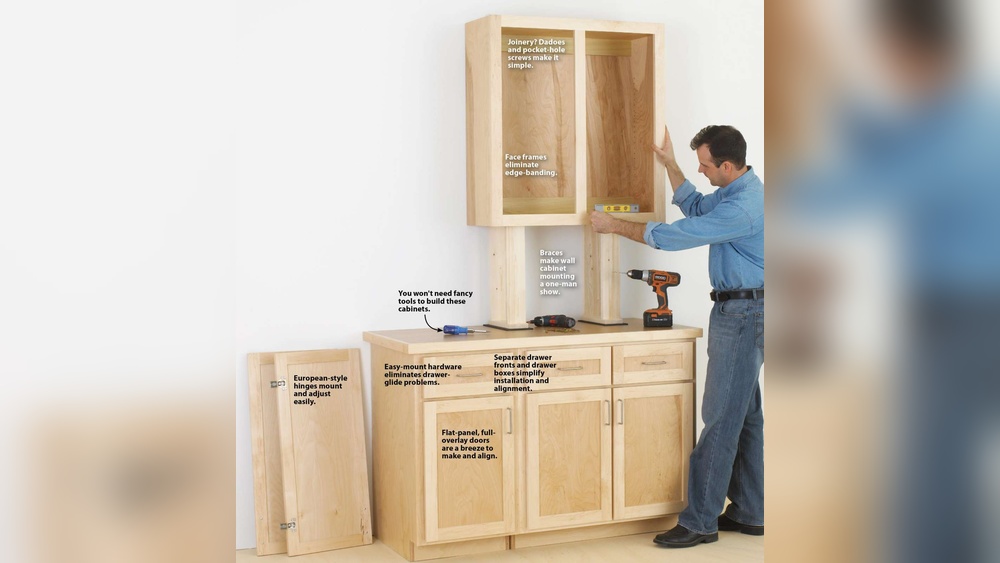
Installing Cabinets
Before installing, prepare the walls well. Check for studs using a stud finder. Mark the stud locations clearly with a pencil. This ensures the cabinets will be securely mounted to the wall. Make sure the wall surface is clean and even.
Use long screws that go deep into the studs. Attach the cabinet frames tightly to prevent any movement. Use a level to keep cabinets straight and even. Secure cabinets one by one, starting from the corner.
After mounting, adjust the doors and drawers. Align doors so they close smoothly without gaps. Tighten or loosen the hinges to fix any misalignment. Check drawer slides for smooth opening and closing. Proper adjustment helps cabinets look neat and work well.
:strip_icc()/20190521_meredith_002-2ad3962f1e604e499b8ce59ebe6481c6.jpg)
Cost And Time Considerations
Material costs depend on wood type, hardware, and finishes. Pine and plywood are cheaper options. Hardwood like oak costs more but lasts longer. Hardware prices vary from basic knobs to premium handles. Paint or stain adds to expenses. Planning materials carefully helps control the budget.
Labor and time investment can be significant. Building cabinets needs cutting, assembling, sanding, and finishing. This process may take weeks, especially for beginners. Skilled workers spend fewer hours but charge more. Time spent affects overall cost, so plan accordingly.
| Aspect | DIY Cabinets | Buying Cabinets |
|---|---|---|
| Cost | Lower if you have tools and skills | Higher for custom options |
| Time | Weeks or more | Days to weeks |
| Customization | Full control over design | Limited by stock or semi-custom choices |
| Skill needed | Woodworking skills required | None needed |
| Convenience | Labor intensive | Faster and easier |
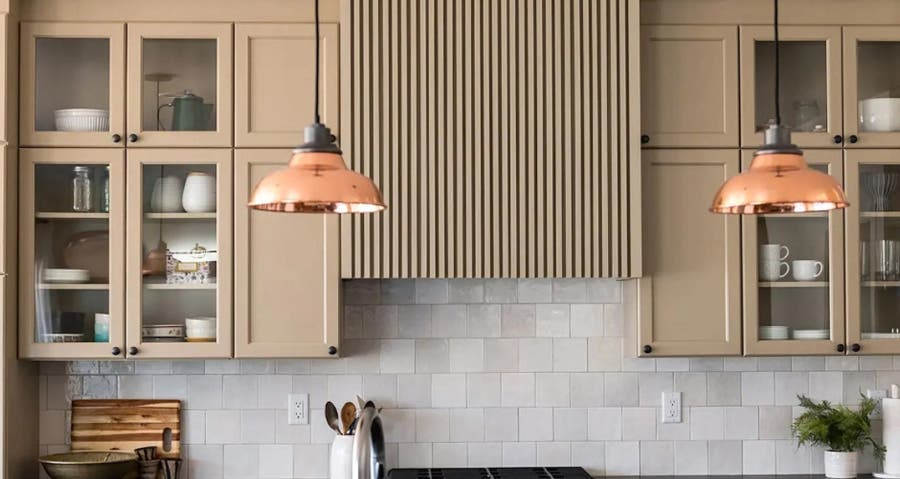
Tips For Customization
Decorative molding adds charm and detail to kitchen cabinets. It can be simple or ornate. Choose styles that match your kitchen theme. Molding frames the cabinet doors and edges, making them look finished and elegant.
Lighting inside or under cabinets brightens work areas. LED strips are popular for their low heat and energy use. They highlight the cabinets and make cooking tasks easier. Lighting also creates a warm, inviting atmosphere in the kitchen.
Storage solutions help keep the kitchen neat and organized. Use pull-out shelves, lazy Susans, and dividers inside cabinets. These features maximize space and allow easy access to items. Custom storage fits your needs and saves time searching for things.
Troubleshooting Common Issues
Alignment problems in kitchen cabinets can cause doors to not close properly. Check hinges and screws first. Tighten any loose screws and adjust hinges carefully. Use a level to ensure shelves and frames are straight.
Warped wood happens due to moisture or poor storage. Replace severely warped pieces for best results. Light warping can be fixed by clamping wood flat and letting it dry slowly. Always store wood in a dry place before use.
Paint imperfections like bubbles or drips ruin the finish. Sand the surface gently to smooth it out. Apply thin, even coats of paint and let each layer dry completely. Use high-quality brushes or rollers to avoid streaks.
:strip_icc()/7003788_DeMattia_0279-e283f1f497224852a79f1fe1ab271f00.jpg)
Frequently Asked Questions
Is It Cheaper To Build Your Own Cabinets Or Buy Them?
Building your own cabinets can be cheaper if you have skills, tools, and time. Buying saves time and offers convenience.
Can A Beginner Build Cabinets?
Yes, beginners can build cabinets by starting with simple designs, learning basic woodworking skills, and using proper tools and tutorials.
How Do I Decide Where To Put Things In My Kitchen?
Place frequently used items within easy reach to save time. Group similar items together for efficiency. Store heavy items lower for safety. Use vertical space for less-used tools. Keep countertops clear to maintain workspace and reduce clutter.
What Type Of Wood Do You Use To Make Cabinets?
We use hardwoods like maple, oak, cherry, and birch for durable, high-quality cabinets. These woods offer strength and beautiful finishes.
Conclusion
Creating kitchen cabinets takes time, skill, and patience. Start with a clear plan and measure carefully. Choose materials that fit your style and budget. Cut and assemble pieces step by step for best results. Sand and finish to protect and beautify your cabinets.
Installing them securely ensures they last long. Building cabinets yourself can save money and allow customization. Remember, practice improves your woodworking skills. Enjoy the satisfaction of a personalized kitchen space made by your own hands.

Yes, working as , Food Blogger and Product Reviewer for last 6 years. Here you will get amazing deals for Smart kitchen products. I am your best source for the latest update in cooking trends. I provide insightful articles, reviews, and analysis on cutting-edge kitchen gadget. My mission is to empower readers with the knowledge they need to stay ahead in a rapidly evolving coking world. Join me as we explore the future of food technology and how it shapes our lives today and tomorrow.